Data Model
The Data Model section of the Archie Core is the interface where you design, configure, and manage your database.
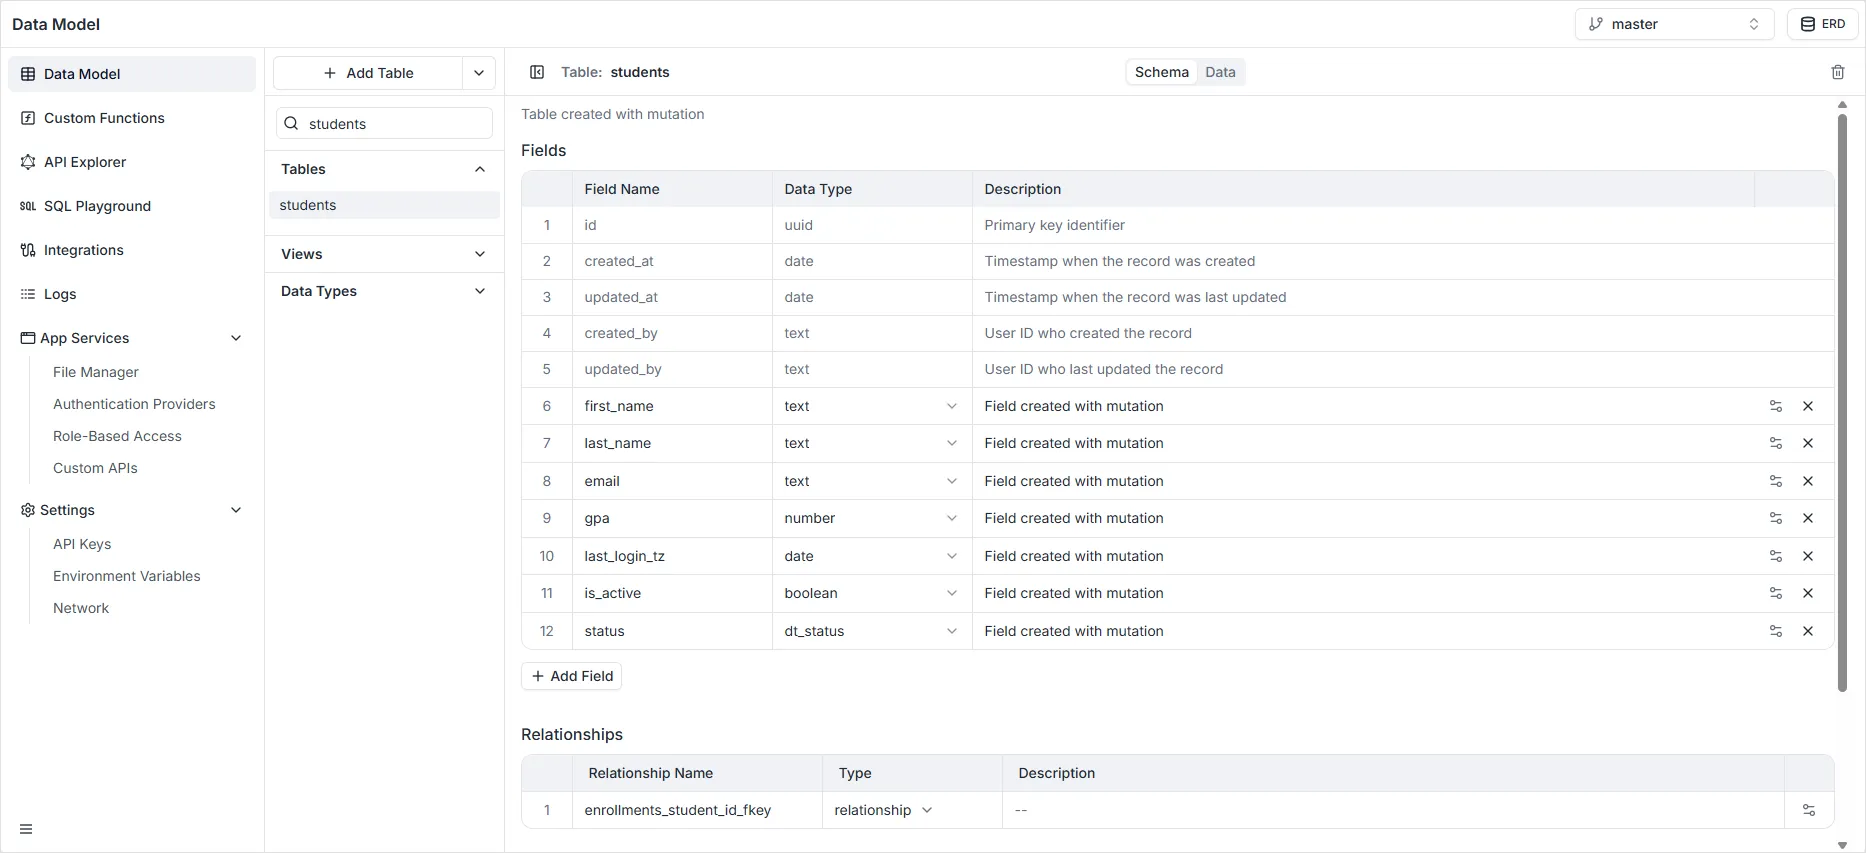
- The Data Builder is a visual database schema designer. You can access it on the Schema tab. This is where you can add or remove fields, and set data validation.
From this view, you can perform the following actions:
- Modify Table Name: Click directly on the table name at the top of the view (e.g.,
students) to rename the entity. - Modify Table Description: Click the text just below the table name to edit its description, helping document the table’s purpose for your team.
- Modify or Delete Fields: On the right side of each field row, use the configuration icon (sliders) to edit the field’s settings, or click the ‘X’ icon to delete the field entirely.
- Add Fields: Click the + Add Field button located below the fields list to create a new column in your table.
- View Relationships: Scroll down to the Relationships section to inspect all foreign key connections linking this table to other entities in your database.
- View Indexes: The Indexes section lists all currently configured database indexes, showing their names, targeted fields, and whether they enforce uniqueness.
- Create Indexes: Click the + Add Index button at the bottom of the screen to define a new index and optimize your query performance.
- Delete Table: Click the Trash Can icon located in the top-right corner of the interface to permanently delete the current table from your data model.
- The Data Viewer is a spreadsheet-like data view and management interface. You can access it on the Data tab. You can create and edit table records, and sort table data. You can also import data from CSV files. This is useful for admins needing to browse and modify the data, or enter sample content while in development.
From this view, you can perform the following actions:
- Add a New Record: Click the black + Add row button at the top left to insert a new entry into the table.
- Delete a Record: Select and remove unwanted records directly from the database.
- Modify a Record: Edit existing data values directly within the table’s cells.
- Import Data: Use the import tool to bulk-upload records into your table.
- Export Data: Click the download icon to export records matching the current active filters and columns selected.
- Sort Records: Click the sort icon (up and down arrows) to order your data based on specific column values.
- Filter Records: Click the Filter icon (funnel) to narrow down the visible records using custom criteria.
- Toggle Fields: Use the View dropdown menu to show or hide specific columns in the data grid, keeping your workspace clean.
